Door Panel Removal - Steps
By Kelly B.
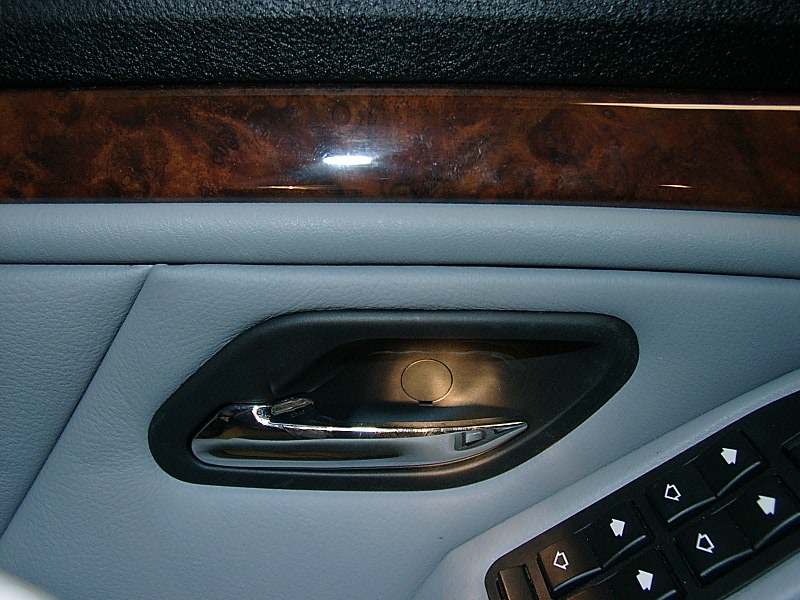
Remove screw behind door handle (pop off cover plug first)
Remove window switch (pry out with micro screwdriver, pull out and disconnect wire connectors)

The entire lower portion of the door panel is fastened with plastic push in clips around its perimeter. Use a long flat screwdriver (or similar) to pry the panel away from the door at each clip point. Start at the outside upper edge just above and below the opening for the lock (striker). Look for the next clip point and pry as close as you can to it. Be careful at the lower outside area - the clips are mounted on the rear of the plastic storage box (not on the panel). You have to push the screwdriver in all the way to the box and pry on it as opposed to prying on the edge of the panel - otherwise you can end up prying the panel off the storage box.
Now you have to deal with the quarter window shade assembly. Use a 1" flat putty knife and slide it under the bottom of the assembly box. You will have to force it upwards to disengage it from the bottom catch. once it is up about 1/4 inch, pull the bottom towards you. This should allow the assembly to now drop downward and un-hook from the top metal catch clip. BE CAREFUL! I did the top on mine and broke the upper clip! Live and learn..
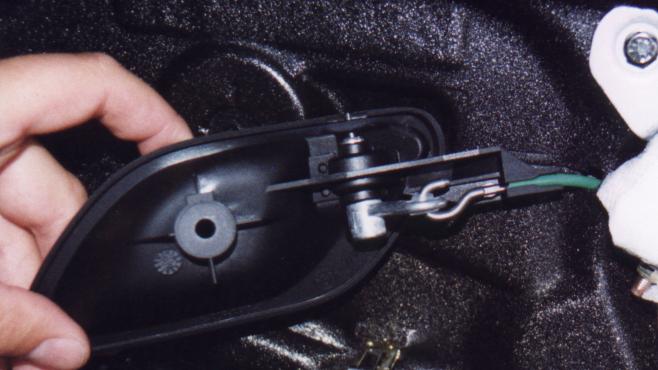
With the lower panel clips all free, pull out slightly on the arm rest handle and then twist and slip the door handle unit back through the opening.
Now gently pry the wood door trim away from the panel to reveal the 2 screw holes. These screws hold the shade assembly to the door. Remove the screws.
Now remove the screw that is holding the door panel to the pillar located between the sliding glass and the quarter window. Don't worry about the clip it's attached to the panel so it wont fall off.
Now pull the entire door panel slightly outward at the bottom and then lift upward - may take some wrestling to free it at the connectors by the window.
Disassembling and Reassembling the shade
There are 3 small screws the hold the shade assembly to the panel. Remove the 2 that are next to the screw holes and the 1 screw on the side of the panel that is closest to the door hinge side of the panel.
Remove the assembly and install the new assembly. Make sure you slide the upper edge of the assembly into the black clips that are attached to the panel before you locate the end of the assembly over the metal prong that gets the screw (by the hinge). These clips keep the assembly from moving up or down when you use the shade.
replace the 3 screws that hold the assembly to the panel.
Reassembling The Door
There is a metal prong on the door that fits into the metal channel behind the arm rest. Make sure it is aligned to the channel.
Double check that the cable from the door handle is fully within it's plastic slot. If it slips out when you are pulling the unit back through the door you will find there is some slack in the handle - once you have it all back together - then you have to pull it off again.

Steps
Thread wires back into location for window switch before you push the door panel on
Push lock button down and fit door panel over button
Push top panel back into clips at window - just thump them to lock into position.
Make sure you pull the wire for the window switch all the way out of the handle - otherwise it might get caught
Now press the lower part of the door into position - onto that metal pin behind the arm rest.
Checking that each clip is over it's corresponding hole just push each clip into place around the door edge. You'll hear a definite snap sound when they're in place.
Replace the screw that holds the door panel to the pillar located between the sliding glass and the quarter window.
Replace the quarter window shade assembly by locating the upper end in it's clip then pressing the lower end into place. Make sure it is snug against the pillar.
Check your door handle to make sure it operates properly.
Press the wood trim back into place.
Put the screws and switch back into place and that's it.


No comments:
Post a Comment